The Classic Sassy Sugar Cookie
Jessica BujaziaShare
An Introduction to the Wonderful World of Sugar Cookies
Who can resist a classic vanilla bean sugar cookie? They’re like a warm hug from grandma! The sweet nostalgic vanilla flavor, a hint of caramel from the brown sugar, and that soft, chewy texture… it’s simply irresistible. I designed this recipe to be my go-to sugar cookie, perfect for non-spreading cut-out cookies ready for decorating with royal icing or fondant. My family has chosen this lightly sweet and salty traditional cookie as our favorite after a few years of creating and testing many recipes. Even though I make them A LOT, I still find myself craving them. Please note, we tend to like our cookies salty (unlike our attitudes), so I use salted butter. You may substitute with unsalted if you prefer. In this tutorial, we’ll walk you through how to whip up these tasty treats, why you need top-notch ingredients, and some easy tricks to make sure your cookies come out delicious every time. I hope you enjoy this recipe and it helps bring your family together for new traditions just like it has done for mine.
Let's Bake Together: Creating Magic with Vanilla Bean Sugar Cookies
Making these classic cookies isn't too tricky, it's actually a great starting point for beginner bakers. The first step involves creaming together the butter and sugar with a stand mixer (or hand mixer if no stand mixer is available). Keep going with the mixing until you get a light and fluffy consistency - that's when you'll know the base for your cookies is just right and ready for the next step.
Next up, we're going to scrape out the inside of the vanilla bean pod and add it to the bowl. This is what gives your cookies that delicious, nutty sweet aroma and taste. Let's also add in the vanilla extract. If you have some homemade bourbon blend on hand, that’s the best (check out our tutorial on how to whip up your own vanilla extract at home), or you can use a high quality ready made blend as well.
Now it’s time for the dry stuff. Grab your flour, sugar, corn starch, baking powder, and a generous pinch of salt. Whisk them together in a separate bowl. Turn your stand mixer on low and begin adding your dry mix a half cup at a time. When you've added all the dry mix, crank up your mixer to medium and keep going till you see the dough start to pull away from the side of the bowl. That's your cue that it's good to go!
Remove the dough from the bowl and place it on a piece of cling wrap. Then, press it into a disc shape. Wrap the dough up and pop it in the fridge for 2 hours for best results. Short on time? No worries, just make sure it gets at least 30 mins of chill time.
Once our dough has had a good chill-out session, we get to start the fun part - rolling out the dough and cutting the shapes! Give that dough disk a good roll until it's somewhere between 1/4 inch and 3/8 of an inch thick. Just remember, the thicker the cookie, the chewier it's going to be. Grab some adorable cookie cutters (The Sassy Sprinkle has a treasure chest of cutter choices) and give them a good press into the rolled dough to get your favorite shapes. Keep at it until there's no dough left. You can give the dough another roll, but I usually stop at two rolls because it starts to spread and bubble up after that.
Pop those cute dough shapes onto a cookie sheet lined with a perforated silicone mat – trust me, you'll get much better results with a mat. Parchment paper can do the trick, but your cookies might not bake as evenly and could end up with a crispier bottom. After your cookie sheet is filled with cut out dough, place the sheet into the freezer for 10 minutes. This step helps the dough maintain its freshly cut shape while baking. Cookie spread? We don't want that friends!
Finally it's off to the oven they go, baking until they're the perfect shade of light golden brown. This is usually between 10-12 minutes at 350 degrees depending on your cookie thickness and size. If you are baking mini cookies, I recommend a max time of 8 minutes.
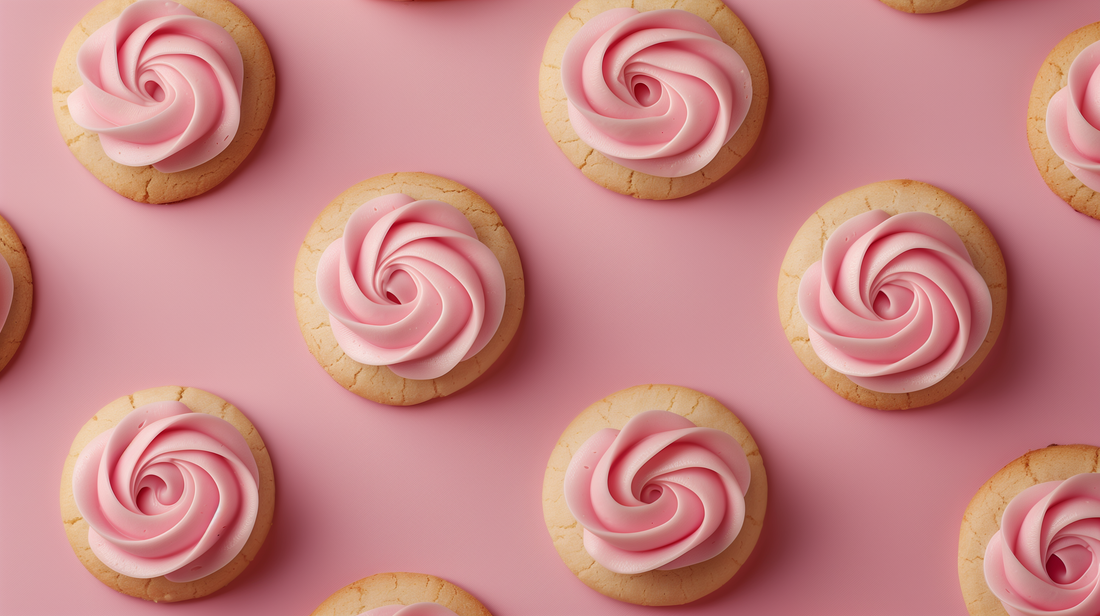
So what's the end result? You've whipped up some seriously tasty cookies that are soft, chewy, and bursting with warm vanilla goodness. Let your cookies cool overnight (or for at least 6 hours if you can't wait that long). Then, boom! They're all set to get decorated with some royal icing or fondant and turned into their final, yummy masterpiece. You nailed it, friend, chef's kiss!
Why Quality Ingredients Really Matter
The ingrediants you put into your cookies really matters. Real butter, homemade vanilla extract, and fresh vanilla bean pods? Yes, please! Vanilla's the star of the show in these cookies, so going with a combo of fresh vanilla beans and some top-notch or DIY extract can totally change the game. It brings a richness and a full flavor depth that's just off the charts. Also, swapping some granulated sugar for brown sugar gives the cookies a little caramel hint and makes them a bit softer. Trust me, it's totally worth it. Here is a list of my favorite top quality ingredients to help you get started on your sugar cookie journey.
- Vanilla bean pods (Heart and Harvest)
- Nielsen-Massey Madagascar Bourbon Pure Vanilla Extract
- Gold Medal Bleached All Purpose Flour
- King Arthur Unbleached All Purpose Flour
- C&H Premium Pure Cane Granulated Sugar
- Challenge Brand Unsalted Butter
- Land O’ Lakes Unsalted Butter
Please note: I DO NOT recommend using premium grassfed butters like Kerrygold for cookies, I have found them to bleed and spread.
Top Baking Tips to Nail It Every Time
Here’s a few simple tips that can elevate your cookie baking game. First, avoid over-mixing the dough as this can result in tough, hard cookies. Mix your dough until it’s just incorporated and falls from the edge of the bowl. Second, chilling the dough before baking helps prevent the cookies from spreading too much during baking. I never skip this step and find it to be one of the most crucial parts to making my sugar cookies turn out perfect. Lastly, make sure to leave enough space between the cookies on the baking sheet in case they do spread a little while baking. Although we take steps to prevent spreading before baking, we shouldn't overcrowd the tray with too many cookies. Trust me, it's not worth redoing the entire batch, especially when you're short on time. Following these tips will help ensure your cookies taste delicious and look beautiful from the first to last batch.
That's a Wrap: Here's What We Learned During Our Cookie Baking Sesh!
Baking classic vanilla bean sugar cookies is not just about following a recipe. It's about understanding and practicing the process, using quality ingredients and baking tools, and making use of helpful baking tips you learn along the way. With what you’ve learned here, lots of practice, and adding your own personal twist on my recipe, you're well on your way to baking cookies that are a true reflection of you as a baker. I'm so glad to be part of your baking journey and I hope this guide was helpful. Thanks again for reading. Stay sassy and bake happy friend!
Recipe
Ingredients
- Flour - 3 cups
- Sugar - 1 cup
- Butter - 1 cup (salted optional)
- Egg - 1 large
- Vanilla - 1 teaspoon
- Salt - 1 teaspoon
- Cornstarch - 1/4 cup
- Water - 2 tablespoons (optional)
Directions
- Preheat oven to 350 degrees. While oven is heating, mix butter & sugar in stand mixer on med. for about 2 mins.
- Add egg and vanilla, continue mixing until combined.
- In a separate bowl, whisk flour, cornstarch, & salt until combined.
- Add dry ingredients to mixer 1/2 cup at a time until a dough forms & separates from the edge of the bowl. If dough seems dry (usually due to a dry climate or time of year) add the optional water.
- Roll out between parchment & chill for 30 mins.
- Remove dough from refrigerator, cut out shapes with your favorite cookie cutters, and bake at 350 degrees for 10-12 mins.
- Remove from oven. Allow to cool on cooling rack for at least a few hours (preferably overnight) and decorate with royal icing or fondant.
- Enjoy your yummy cookies with friends and family!